Washi Tape Clothespins: Decorated Clips for Photos and Notes
Cover wooden spring clothespins with washi tape, trim the overhang cleanly with a craft knife or a nail file, and use the clips as photo hangers, memo magnets, bag clips and place-card holders.

Tutorial at a glance
Materials
- Plain wooden spring clothespins
- Twine for a photo line
- Self-adhesive magnet strip (optional)
- Water-based sealer and a soft brush (optional)
Washi tape clothespins are one of the few tape projects where the tape is wider than the thing you are covering. A standard wooden spring clothespin has two flat faces about 3/8 in (roughly 10 mm) wide, and a standard roll is 15 mm, so every strip overhangs on both sides. The whole project comes down to removing that overhang neatly.
What you need
- Wooden spring clothespins, plain and unvarnished. Smooth, pale wood shows the tape colors most clearly.
- 15 mm washi tape in two or three patterns.
- A craft knife and a self-healing cutting mat, or a nail file or fine sandpaper if you would rather not use a blade.
- Scissors for cutting strips to length.
- Optional: water-based sealer and a small soft brush, self-adhesive magnet strip, twine.
Craft knives are for adult hands. With children, use the nail file method below.
Check the wood before you tape
Clothespins are often rough straight out of the bag. Run a fingertip along each face. If you feel splinters or raised grain, rub the face a few times with fine sandpaper or a nail file, then wipe off the dust with a dry cloth. Dust is the usual reason a strip lifts at the ends a day later.
Each face has a long flat section, a short slope at the jaw end and one or two grooves near the spring. Tape follows the slope if you press it down, and a fingernail pushes it into the grooves.
Cover the first face
- Cut a strip a little longer than the clothespin, about 3 1/4 in (8.5 cm) for a standard clip. Scissors give a cleaner end than tearing here.
- Hold the clothespin closed and lay the strip along one face, centered so the overhang is roughly equal on both sides. Start at the handle end and smooth toward the jaw without pulling. Stretched tape shrinks back and lifts.
- Press the strip down along its whole length with a fingernail or the back of a spoon, working from the middle outward. Pay attention to the two ends and the long edges.
- Let the extra length hang past the jaw end for now. You will trim it with the sides.

Two ways to remove the overhang
Trim from the back with a craft knife
Turn the clothespin over so the taped face lies flat on the cutting mat, sticky overhang facing up. Hold the clip firmly, keep your fingers behind the blade, and run the knife along the edge of the wood, using the wood itself as the guide. One light pass per side is enough for paper tape. Cut across the jaw end the same way and peel away the offcuts.
This gives a crisp edge that sits flush with the wood. Once the clips are done, the same rolls can cover the round barrels in the guide to wrapping pencils with washi tape.
Sand it off with a nail file
Hold the clothespin with the taped face up and stroke a nail file downward along the edge of the wood, at about 45 degrees, always moving away from the taped face. The file cuts the paper against the corner of the wood and the overhang falls away in a thin ribbon. Filing upward toward the tape lifts the edge, so keep every stroke going down.
Tip
Do not wrap the overhang around the sides instead of trimming it. The sides of a clothespin are narrow and rough, and wrapped tape lifts there first.
Cover the second face and keep the spring clear
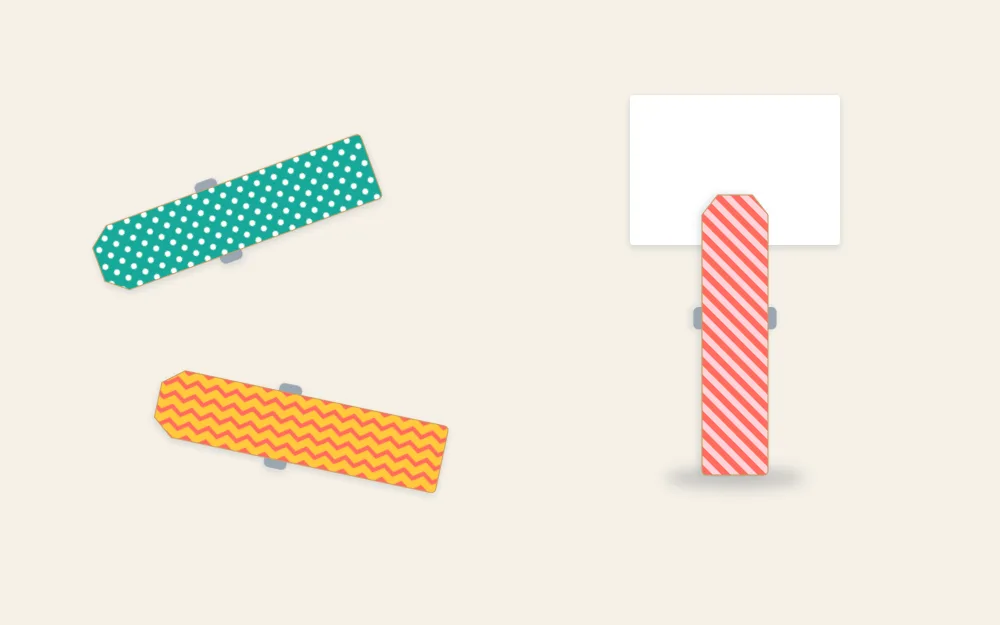
Repeat on the other face with the same tape or a contrasting one. Then open and close the clip a few times. The tape should stop at the edges of the wood and leave the metal spring, the inner jaw surfaces and the side notches bare. Tape caught under the spring coil stops the clip closing fully, and tape on the inner jaw makes it slip on paper.
Optional: a thin coat of sealer
Clips that are opened many times a day wear at the ends. A thin coat of water-based sealer over the taped faces helps the tape stay put. It is optional, and clips on a photo line do not need it.
Brush on a thin, even layer, keep it away from the spring, and clip each one to the rim of a jar so the wet faces touch nothing. Let them dry fully, following the time on the sealer label. Sealer makes the tape harder to remove later.
Four uses for the finished clips
- Photo line. Stretch twine between two hooks or pins and clip prints along it. The same line works for cards at a celebration, alongside other small party decorations made from tape.
- Memo magnets. Cut a piece of self-adhesive magnet strip to fit the back face and press it on over the tape, or leave that face bare for a stronger bond to the wood. One clip holds a few sheets of paper on a metal board.
- Bag clips for dry goods. Fold over the top of a bag of rice, tea or pasta and clip it. The tape stays on the outside of the bag and away from the food, and the clips should be kept out of the fridge and freezer, where the tape loosens.
- Place-card holders. Stand a clip on its two handle ends, jaws up, and slide a small card into the jaws.
If the photo line is going against a painted wall, hang it from existing hooks where you can. Taped designs around it are a separate job with their own cautions, covered in the guide to removable washi tape wall decor.
Small problems and their fixes
- Ends lifting at the jaw. The slope was not pressed down. Burnish it again, or cut the strip to end where the flat section stops.
- Ragged knife edge. The blade is dull or the angle too steep. Change the blade and use a lighter pass.
Covered clips are not for the laundry line. Washi tape does not stand up to water or sun, so keep these indoors and wipe them with a dry cloth if they get dusty.
Frequently asked questions
Does washi tape stay on wooden clothespins?
It holds well on smooth, clean, dry wood if you press it down firmly and do not stretch it while applying. Rough or dusty wood is the usual cause of lifting, so sand lightly and wipe first. Clips that are opened constantly may still wear at the ends, and a worn strip is easy to peel off and replace.
Can children make washi tape clothespins?
Yes, with the nail file method. An adult cuts the strips to length, the child sticks them on and presses them down, and the overhang is filed away with downward strokes along the edge of the wood. Keep the craft knife version for adults, since it needs a sharp blade and a cutting mat.
Is sealer needed over the tape on clothespins?
No. Clips used for display hold up without any coating. A thin coat of water-based sealer is worth considering only for clips that are handled many times a day, such as bag clips. It needs to dry fully before use, and it makes the tape harder to remove if you want to change the pattern later.