Washi Tape Jars: Decorating Glass Jars for Storage and Display
How to prepare glass so washi tape stays on, then wrap level bands, vertical stripes and a color-dipped base, handle tapered jars, and use the results as pen jars, vases and light jars.

Tutorial at a glance
Materials
- Clean glass jars with smooth sides
- Rubbing alcohol
- Cooking oil for label residue
- Battery-operated LED string light (optional)
Glass is one of the smoothest surfaces washi tape meets, which makes it both easy and unforgiving. On a clean jar a strip goes down flat and peels off again without a mark. On a jar with a trace of label glue or kitchen grease, the same strip slides, bubbles and lifts by the next morning. Washi tape jars are mostly a cleaning job followed by a few minutes of wrapping.
Which jars work
Straight-sided jars are the simplest: glass canning jars with smooth sides, jam jars, and tall sauce or pickle jars. A strip wrapped around a true cylinder meets itself exactly, so horizontal bands stay level.
Tapered and rounded jars need a different approach, covered further down. Avoid embossed lettering and raised patterns. Tape bridges across raised glass and leaves air channels that let it lift.
Clean the glass properly
This is the step that decides whether the tape stays on.
- Soak the jar in warm soapy water until the paper label slides off, about 20 to 30 minutes for most labels.
- Rub off leftover glue. A little cooking oil worked in with a cloth softens stubborn residue; scrape gently with a fingernail or the edge of an old plastic card.
- Wash again with dish soap to remove the oil, rinse, and dry the jar completely, including the rim and the base.
- Wipe the outside with rubbing alcohol on a lint-free cloth and let it evaporate. From this point, hold the jar by the rim or the inside so you do not put fingerprints where the tape will go.
Glass should be at room temperature. Tape grips poorly on cold glass.
Horizontal bands on a straight jar
Stand the jar on the table and decide where the first band goes. A level starting line matters more than anything else, because every later band is spaced from it. A rubber band rolled into position and leveled by eye makes a simple guide.
- Cut a strip about 1/2 in (1.3 cm) longer than the distance around the jar.
- Press one end onto the glass at the back of the jar, where the seam will be hidden.
- Turn the jar with one hand and guide the tape with the other, laying it down without pulling. Let it follow the line; do not steer it by stretching.
- Overlap the end over the start and press the whole band down with a fingertip, then go over the seam with a fingernail.

For even spacing, use a spare strip of tape as a spacer: hold it against the edge of the band you just applied and lay the next band along its other edge.
Tip
If a band drifts upward as it goes around, the jar is slightly tapered. Peel it back gently and switch to vertical stripes for that jar.
Vertical stripes and the color-dipped base
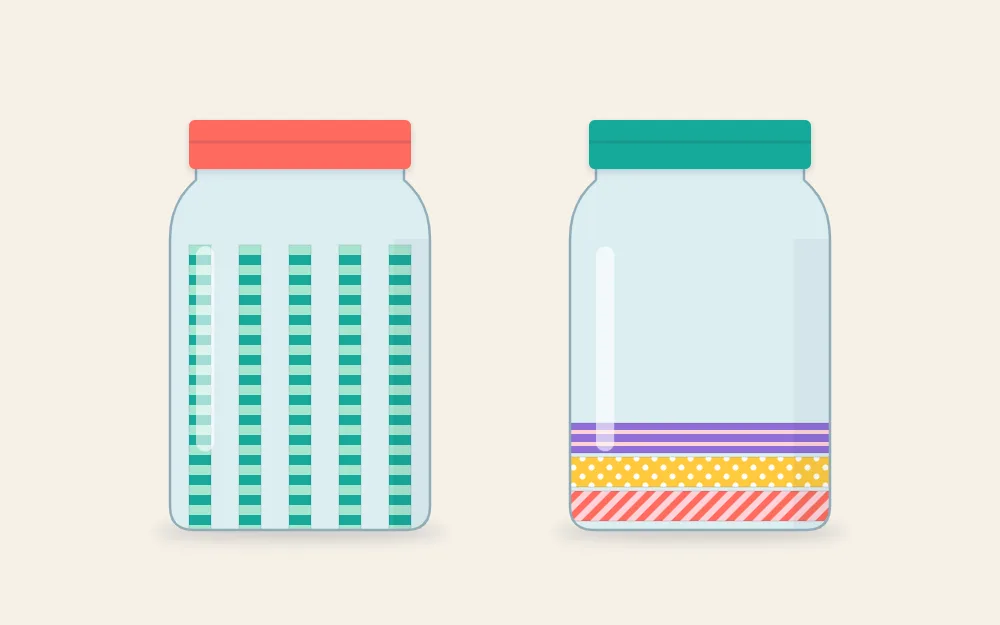
Vertical stripes suit jars of any shape. Cut all the strips to the same length first, a little shorter than the straight part of the side. Place the first strip, then the one directly opposite it, then the two halfway between, and keep halving the gaps. Working this way spreads any spacing error around the jar instead of leaving one odd gap at the end.
Line up the top ends against the same feature on every strip, such as the bottom of the screw thread or the start of the shoulder. The lower ends can stop just above the curve of the base.
The color-dipped look uses bands only at the bottom. Start with one band as low on the straight side as it will sit flat, then add two or three more directly above, each butted against the last with no gap, so the lower third of the jar reads as a solid block.
Tapered, shouldered and curved jars
A straight strip cannot wrap flat around a cone or a bulge; it wrinkles along one edge. Three adjustments help:
- Go vertical. Strips running from top to bottom follow a taper with very little distortion.
- Use slim tape. A 5 to 7 mm tape bends around a gentle curve where a 15 mm tape would pucker.
- Use short pieces. Instead of one long band, apply a ring of short overlapping segments, each about 1 in (2.5 cm), angled slightly to follow the curve. The overlaps become part of the pattern.
Keep bands on the straightest part of the jar and leave shoulders and necks bare.
Finish the lid rim
A metal screw lid has a flat rim that takes a single strip well. Wipe it with alcohol, then wrap a strip around the side of the lid, seam at the back. If the tape is wider than the rim, align it with the top edge and trim the excess along the lower edge with scissors.
Ways to use a taped jar
- Pen jar. A wide straight jar holds pens and scissors. It pairs well with tin cans and trays decorated in the same tapes, as described in the guide to making a matching set of desk organizers.
- Dried flower vase. Dried stems need no water, so the outside stays dry. For fresh flowers, fill carefully and wipe drips at once.
- Button and bead storage. Leave a clear window between bands so you can see the contents, and add a written strip as described in the guide to removable tape labels for jars and bins.
- Light jar. Coil a battery-operated LED string light inside.
- Table jars. A row of small banded jars with stems or wrapped sweets suits a celebration table, together with other tape party decorations.
Limits to respect
Taped jars are not for lit candles of any kind, including tea lights. Glass around a flame gets hot, and paper tape does not belong on a hot surface. Use battery-operated lights only.
The tape does not stand up to water. Wipe a decorated jar with a barely damp cloth and dry it straight away; do not soak it or put it in a dishwasher, and expect bands to loosen in a fridge or freezer.
Keep tape on the outside of the jar and below the rim, away from direct contact with anything edible stored inside.
Frequently asked questions
Does washi tape stick to glass?
Yes, it holds well on clean, dry, smooth glass at room temperature. Problems nearly always come from label glue, grease, fingerprints or moisture left on the surface. Wash the jar, dry it fully and wipe it with rubbing alcohol before taping, then press each band down firmly, especially at the seam.
Can you put a candle in a washi tape jar?
No. Glass around a lit candle or tea light heats up, and washi tape is paper with adhesive that should not be used on hot surfaces or near a flame. For a glowing jar, use a battery-operated LED string light or a battery tea light instead.
Can you wash a jar decorated with washi tape?
Only by wiping. Use a slightly damp cloth on the glass between the bands and dry it right away. Soaking, a dishwasher, or time in a fridge or freezer loosens the adhesive. If the jar needs a full wash, peel the tape off first and apply fresh strips once it is dry.