Washi Tape Page Tabs and Dividers for Journals and Planners
Three ways to mark sections with tape: a quick fold-over flag, a stiffened tab with a card insert and an edge-strip divider, plus how to stagger and color them.
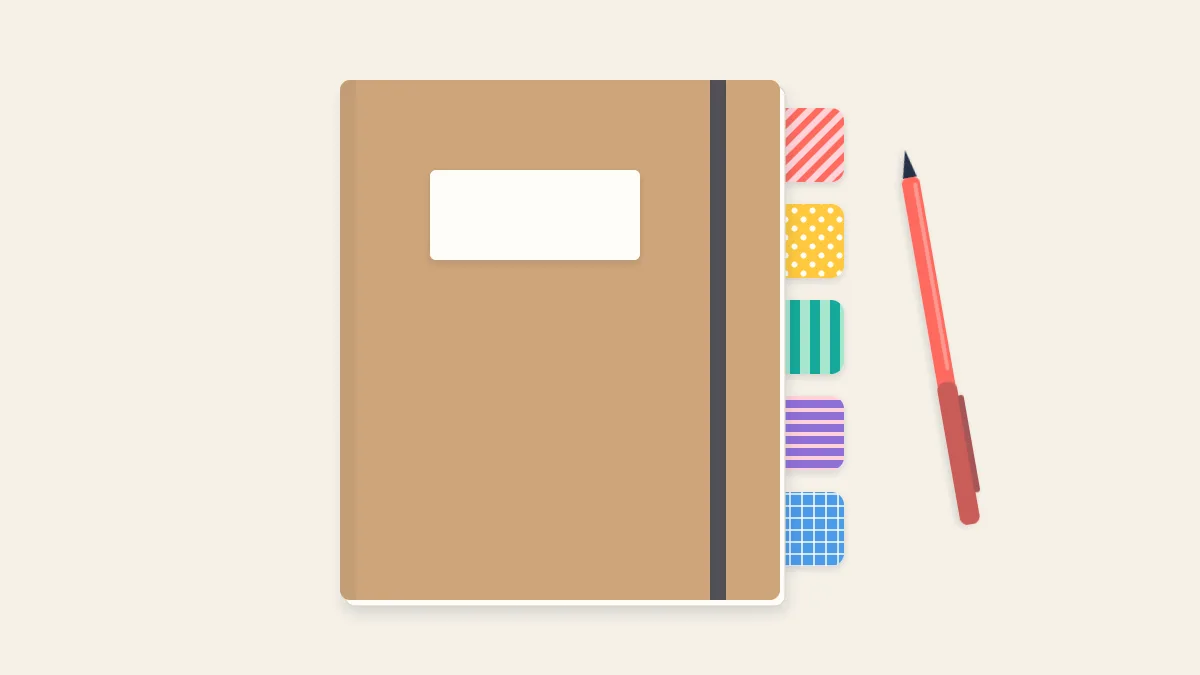
Tutorial at a glance
Materials
- A journal, notebook or planner
- Cardstock scraps for inserts
- Scrap paper to protect the next page
Washi tape page tabs solve a plain problem: finding the right section of a notebook without flipping through it. A short strip folded around the edge of a page sticks out just far enough to catch a thumb, and its color tells you which section it marks.
There are three builds here, from a ten-second flag to a stiffened tab and a full-edge divider. All three work in bound journals, spiral notebooks and ring planners.
What you need
- Washi tape, 15 mm for standard tabs, 20 mm or wider if you want room to write
- Scissors with a clean blade
- A ruler and a pencil
- A scrap of cardstock, for the reinforced version
- A sheet of scrap paper to slip behind the page while you work
Solid colors and simple patterns are easiest to tell apart on the edge of a closed book. Two florals in similar shades look identical from the side.
Plan the positions before you stick
Tabs only help if each one can be seen. If they all sit at the same height, the front one hides the rest. Stagger them down the outer edge so that each tab starts where the one before it ends, like the steps of a staircase.
Count the sections, then divide the page height by that number. On a page about 8 in (20 cm) tall with five sections, each tab gets a slot of roughly 1 1/2 in (4 cm). Mark the slots lightly in pencil on the first page and use it as a gauge for the others.
Keep the overhang, the part that projects beyond the paper, to about 1/4 to 3/8 in (6 to 10 mm). Less is hard to grip. More bends over and tears in a bag.
Build 1: the fold-over flag tab
This is the basic tab, made from tape alone.
- Cut a strip about 2 in (5 cm) long with square ends.
- Slip scrap paper behind the page. Lay the strip across the outer edge at its slot, so about 5/8 in (1.5 cm) of it sits on the front of the page and the remainder hangs off the edge.
- Press the part on the page down firmly.
- Fold the hanging part back on itself, leaving the 1/4 to 3/8 in overhang, so the tape sticks to itself beyond the page edge and then to the back of the page.
- Pinch the overhang from the fold toward the paper to push out air, then burnish both sides.
- Round the two outer corners of the tab with scissors.
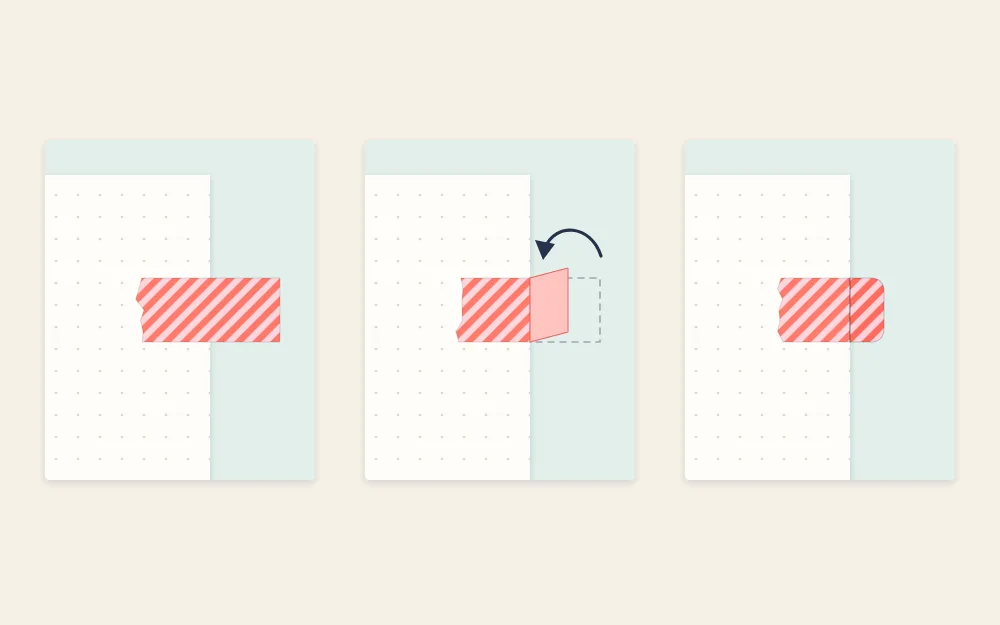
Square corners catch on neighboring pages and are the first place a tab starts to peel.
Build 2: a reinforced tab with a card insert
A flag made of two layers of tape is soft. For sections you open many times a day, a sliver of cardstock inside keeps the tab stiff.
- Cut a piece of cardstock about 1/2 in (12 mm) square, so it is a little narrower than 15 mm tape. For a wider tape, cut the insert about 3 mm narrower than the tape.
- Cut a strip of tape about 2 1/2 in (6.5 cm) long and lay it sticky side up.
- Set the page edge on the strip as in the first build, with the tape running off the edge.
- Place the card insert on the exposed adhesive so it butts up against the page edge, centered between the sides of the tape.
- Fold the remaining tape over the insert and onto the back of the page. Press around the insert so the tape seals to itself along both sides.
- Trim the overhang to about 3/8 in (10 mm) if needed and round the corners, cutting through tape and card together.
The narrow margin of tape on either side is what holds the insert in place. A card as wide as the tape slides out sideways.
Tip
To letter a tab, write on the card insert side before folding, or on the finished tab with a permanent fine marker, and let the ink dry before closing the book.
Build 3: the edge-strip divider
A divider has no overhang at all. The tape wraps the whole outer edge of one page, so the section shows as a colored line on the side of the closed book. It cannot snag, which suits notebooks carried in a bag.
- Cut a strip slightly longer than the page is tall.
- Put scrap paper under the page. Starting at the top, lay the strip down the front of the page along the outer edge so half the width of the tape is on the paper and half hangs off.
- Work downward a few inches at a time, pressing as you go without stretching.
- Turn the page and fold the hanging half onto the back, again from the top down.
- Burnish along the edge and trim the top and bottom flush with scissors.

Each wrapped page adds two layers of tape at the edge, so a notebook with many dividers will fan open slightly.
One color per section
Give each section its own color and keep that pairing across notebooks: the same green for notes, the same yellow for lists.
In a dated planner, tabs usually mark months or the current week, and the same colors can carry over to the strips on the pages themselves; see the ideas for marking weeks, events and deadlines in a planner. In an undated journal, tabs tend to mark collections and recurring pages, and they sit comfortably beside the other ways to use washi tape on a journal page.
Writing on tabs follows the same rules as any tape label: pale solid tape, permanent fine marker, a minute to dry. The article on washi tape labels for storage explains which pens work and how to build a color key.
Moving and removing tabs
Tabs can be lifted and placed again while they are fresh, which helps when a section grows. On coated or heavy paper they come away easily. On thin journal paper, peel slowly, keep the tape low and close to the page, and support the sheet with a finger beside the tab. If the paper starts to lift with the tape, stop and peel from the other side instead.
Mistakes that shorten a tab’s life
- Too much overhang: long tabs fold over and crease. Stay within 3/8 in.
- Too little tape on the page: a tab gripping only a sliver of paper pulls off. Aim for about 1/2 in (1.3 cm) on each face.
- Misaligned halves: if the fold is crooked, sticky edges are exposed and collect dust. Trim them off.
Frequently asked questions
How far should a page tab stick out?
About a quarter to three-eighths of an inch, or 6 to 10 mm, beyond the edge of the paper. That is enough to catch with a thumb but short enough to stay flat inside a bag. Longer tabs bend and crease, and shorter ones are hard to find by feel.
Will washi tape tabs tear the pages when removed?
On sturdy or coated paper they usually lift cleanly. Thin journal paper is more delicate, so peel slowly with the tape held low against the page and a finger supporting the sheet. If the surface begins to lift, stop and work from the opposite side. Fresh tabs come away more easily than old ones.
Do tape tabs work in ring planners and spiral notebooks?
Yes. The tabs attach to the outer edge of the page, so the binding does not matter. In a ring planner you can also put tabs on a blank divider sheet of cardstock instead of on a dated page, which keeps them in place when the inserts are replaced.


