Washi Tape Borders: How to Frame a Page Neatly
Frame a journal page, card or mat with straight washi tape strips and tidy corners: overlapped, mitered or a gap with a square accent, plus partial and double borders.
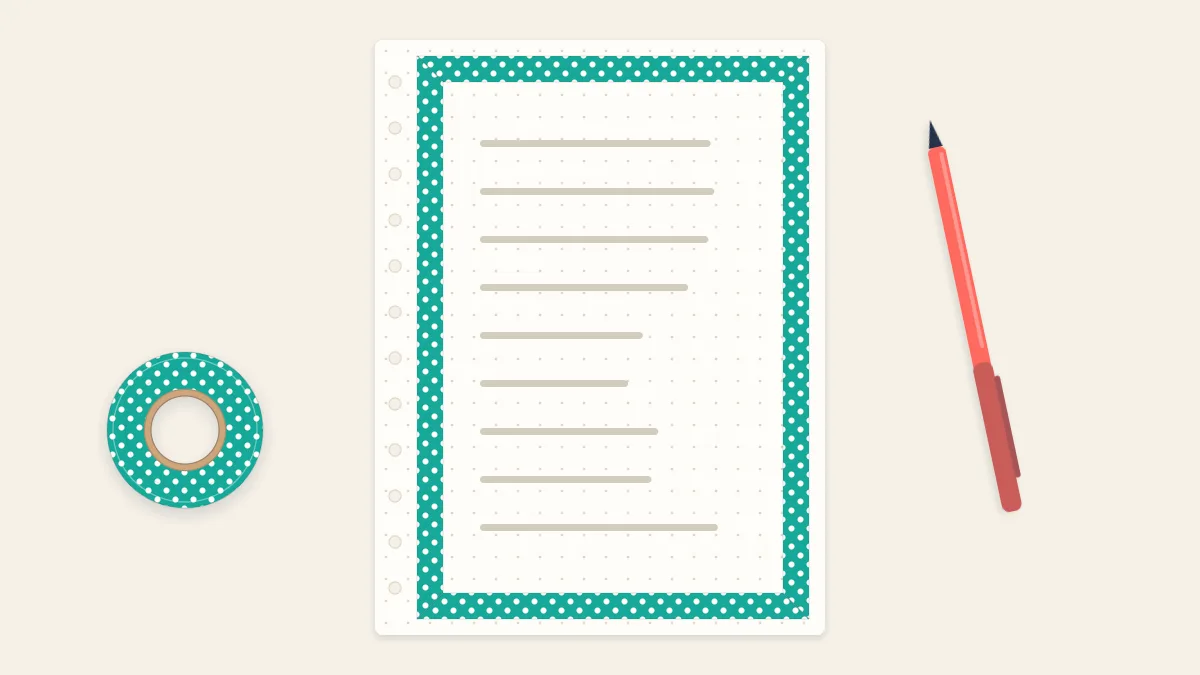
Tutorial at a glance
Materials
- A journal page, card front or paper mat
- A contrasting tape offcut for corner accents
- Scrap paper for a practice corner
Washi tape borders are four straight strips and four corners, and the corners are where a frame looks either careful or rushed. Straight sides are mostly a matter of having a line to follow. Corners need a decision made before the first strip goes down.
This method works on a journal page, a card front or a paper mat around a print.
What you need
- One 15 mm tape for the main border, and optionally a slim tape of 3 to 5 mm for a second line
- A ruler and a soft pencil with an eraser
- Scissors
- A craft knife and a self-healing cutting mat, for mitered corners only
Plain tapes, small dots and fine lengthwise stripes are the easiest to use. Large directional prints will not line up at the corners.
Set the guides and the margin
Decide how far the border sits from the paper edge. Three placements work well:
- Flush with the edge, for cards and loose sheets. No guide is needed: the paper edge is the line.
- Inset by about 1/4 in (6 mm), which leaves a rim of paper showing and looks lighter.
- Inset on the three outer sides, with a wider margin at the spine, for bound notebooks.
On dotted or squared paper, count squares in from each edge and follow the printed grid. On plain paper, mark the inset with a small pencil tick near each corner and line the outer edge of the tape up with the ticks. Keep the ticks faint and under the tape’s path, because pencil shows through pale rolls.
Watch out
Keep tape out of the notebook gutter. A strip that runs into the fold wrinkles each time the book closes and can pull at the binding. Stop at least 1/4 in (6 mm) short of the fold, or leave the spine side open.
Lay the four strips
- Cut or tear each strip about 1 in (2.5 cm) longer than the side it covers. Extra length at both ends is what makes every corner style possible.
- Start with the top and bottom strips. Anchor one end, hold the other end just above the paper, sight along the guide and lower the strip from the anchored end forward. Do not stretch it.
- If the line drifts, lift the strip slowly and lay it again. On thin journal paper, peel at a low angle so the surface does not come up with it.
- Add the two side strips over the ends of the first pair.
- Press everything lightly for now. Burnish firmly only after the corners are finished, since some of them need you to lift an end.
Trimming strips flush with a paper edge, and keeping scissor blades free of adhesive, is covered in the guide to cutting washi tape cleanly.
Three ways to finish the corners
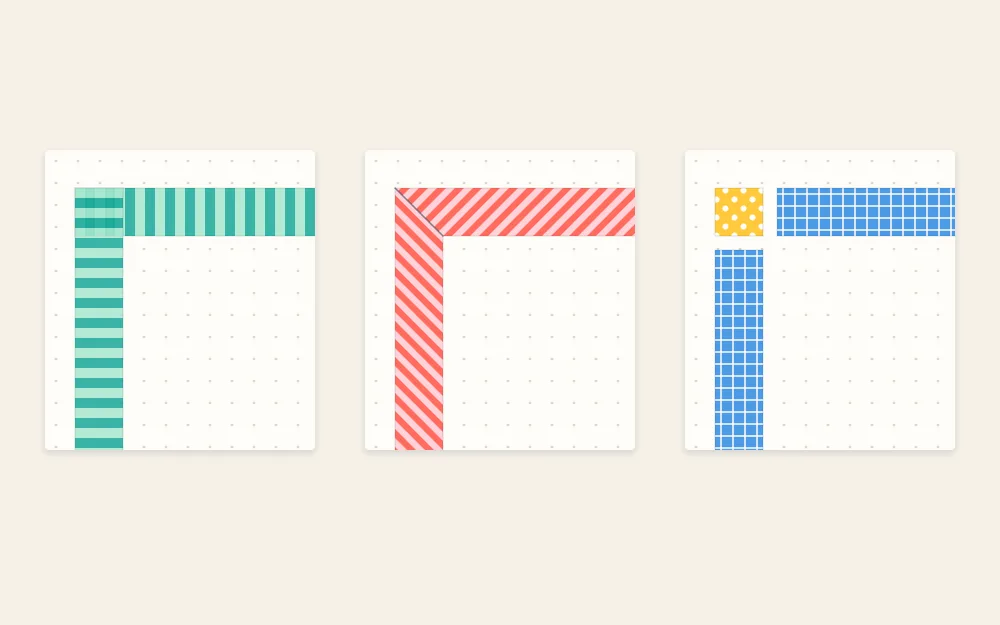
Overlapped square corner
The simplest finish. Let the side strips run over the top and bottom strips, then cut each end square, level with the outer edge of the strip beneath. Use the same order at all four corners: sides over top and bottom every time. The overlapped square looks a shade darker, which suits plain tapes better than busy prints.
Mitered corner
A miter gives the diagonal join of a picture frame. Both strips are cut at once, so the two angles match.
- Slide the cutting mat under the page or card. In a bound notebook, the mat goes directly beneath the page you are working on.
- Let the two strips cross fully at the corner, each running past the other.
- Place the ruler from the outer point of the corner, where the outside edges of the strips meet, to the inner point, where the inside edges meet.
- Draw the knife along the ruler with light pressure, through both layers of tape.
- Peel away the loose triangle from the top strip. Then lift the end of the top strip, remove the loose piece of the lower strip from beneath it, and lay the top strip back down.
- Press the join. The two cut edges should meet along the diagonal without a gap or a double layer.
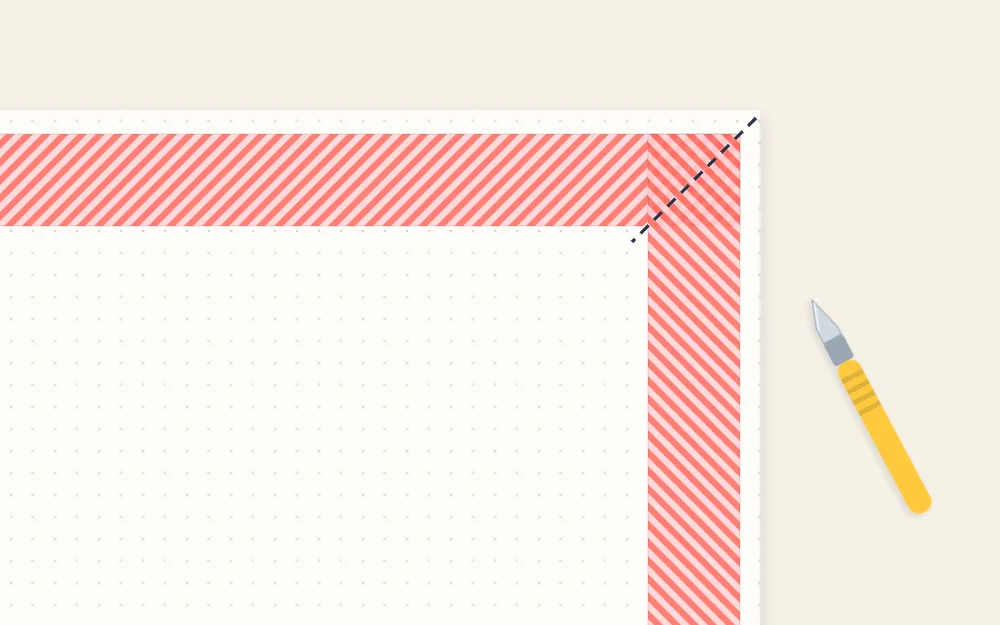
The blade will mark the paper under the tape. On cardstock that is a faint score hidden by the join. On thin journal paper it may cut through, so for those pages miter with scissors instead: mark the diagonal on each strip end with a pencil, lift the end, snip along the mark and lay it back.
Gap corner with a square accent
Stop each strip short so that the four corners are left empty, each gap the size of one tape width. Cut a square from a contrasting tape, 15 mm long from a 15 mm roll, and place it in the gap, either straight or turned 45 degrees as a diamond. Nothing overlaps and nothing needs a knife.
Partial and double borders
- Top and bottom only. Two horizontal strips frame the writing area with no corners at all.
- An L-shaped corner pair. Border the top left and bottom right corners with two short strips each, about 2 in (5 cm) per arm. The eye completes the rectangle.
- A double border. Lay the 15 mm border first, then run a slim tape inside it, leaving a gap of about 1/8 in (3 mm). Use overlapped corners on the slim line: mitering a 3 mm tape is fiddly and rarely shows.
- A patterned border. Replace plain strips with a row of cut triangles or short chevron pieces set along the guide. The cutting for those shapes is in the guide to geometric tape patterns.
Common border problems
- The frame is not square. Opposite strips were placed by eye. Measure the inset at both ends of every strip before pressing it down.
- A sliver of gap at the miter. The ruler slipped or the strips moved after cutting. Lift one end and nudge it toward the join; washi allows a small shift.
- Ends curling. The strip was stretched or the ends were not burnished. Rub each corner with a fingernail or the back of a spoon.
Using the frame
A border sets off a title page, a quotation or a mounted photo. For other ways to put tape to work on a spread, such as headers, pockets and corner accents, see the list of washi tape journal ideas.
Frequently asked questions
How do you get washi tape corners to line up?
Cut every strip longer than its side so the ends cross at the corner, then deal with the overlap in the same way at all four corners. For a miter, cut one diagonal through both layers and remove the two loose pieces. Using one method and one strip order throughout is what makes the frame look even.
Can you miter washi tape without a craft knife?
Yes. Lay the two strips so they cross, mark the diagonal lightly on each end with a pencil, lift the ends one at a time and snip along the mark with small sharp scissors. Lay them back so the cut edges meet. It is slower than a knife but safer on thin notebook paper.
What width of washi tape is best for a page border?
A standard 15 mm tape suits letter, A4 and A5 pages and most card fronts. On pocket notebooks and small cards it can look heavy, so a slim tape of 5 to 7 mm is a better fit. Wide tapes of 20 mm and more take up a lot of writing space and work best on large sheets or mats.


